A flat sheet of rigid PETG that bends, flexes, and compresses like rubber. No special filament. No magic. Just a pattern of tiny rectangles cut clean through... and suddenly the impossible becomes tactile.
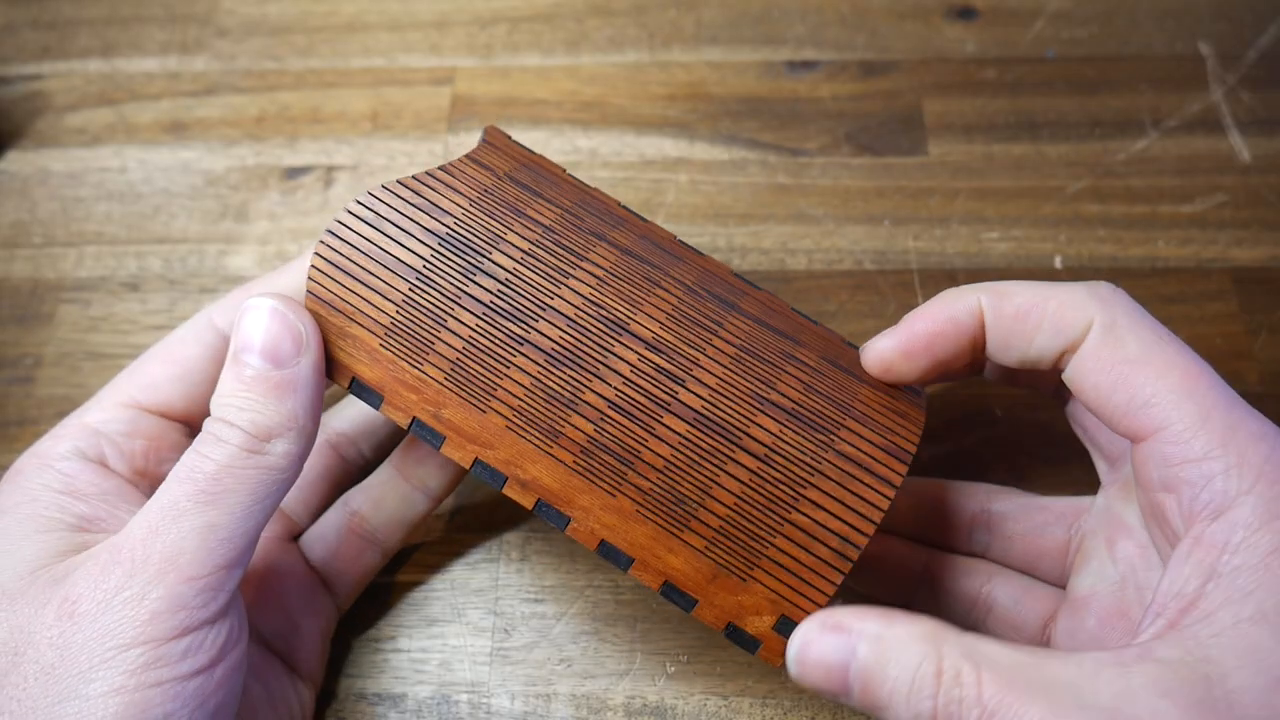
Michael Laws from Teaching Tech has been eyeing this trick for years. It started with a gift... beautiful laser-cut timber pieces from his former school. Four millimeters thick, yet flexible enough to curve into complex shapes. The secret? A living hinge pattern sliced clean through the material.
He wanted to know if the same principle could cross over into 3D printing. Spoiler... it absolutely can.
The Pattern Is Simpler Than You Think
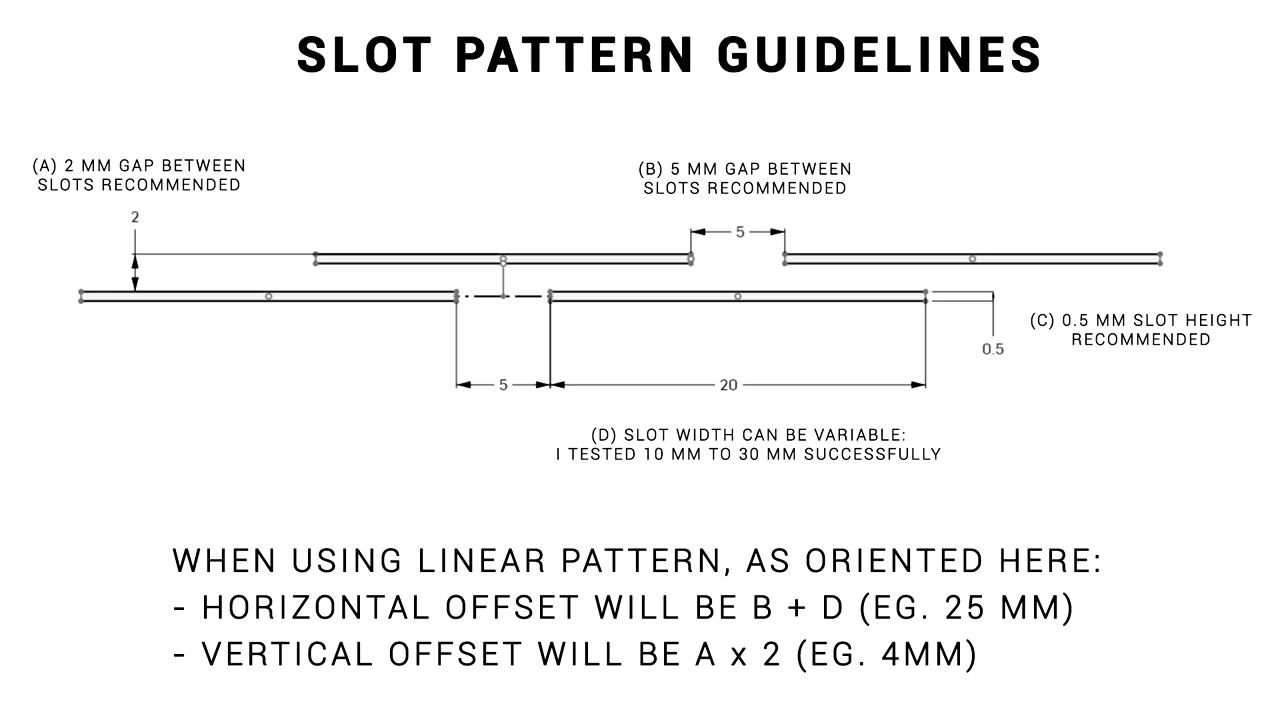
The core concept lives in a sketch of four rectangles. Each slot measures 30mm long by 0.5mm wide, spaced 5mm apart in a staggered grid. That's it. That's the foundation.
Using Onshape's linear pattern tool, those four humble rectangles multiply across your entire surface in seconds. What would take hours to draw by hand becomes a few parameter inputs. You set horizontal and vertical spacing, dial in the number of copies, and watch the grid fill your shape.
Then you extrude-cut the pattern through a 2mm thick base. Done.
The beauty here isn't complexity. It's the elegant simplicity of a well-understood constraint. You're not adding flexibility... you're strategically removing rigidity. Every slot is a tiny permission for the material to move.
PETG Is Your Best Friend Here
PLA will work in a pinch. It bends. But push it too far and it cracks... it doesn't forgive. PETG is the real winner. It has enough natural flex to let the hinge pattern sing without snapping under stress.
Michael didn't mess with perimeters or infill. Standard slicer settings. The geometry does the heavy lifting, not the print parameters. That's a powerful lesson in design for manufacturing... sometimes the smartest optimization happens in CAD, not in the slicer.
Beyond Simple Bending
Here's where it gets interesting. The slot pattern doesn't just enable a clean fold. It creates spring-like behavior. Compress it and the rectangles deform into triangles. Stretch it and they become diamonds. Twist it and you get compound curves that mimic steam-bent hardwood.
Michael tested this progression beautifully:
- Proof of concept: A simple flat sheet that bends freely. Satisfying to hold. Hard to put down.
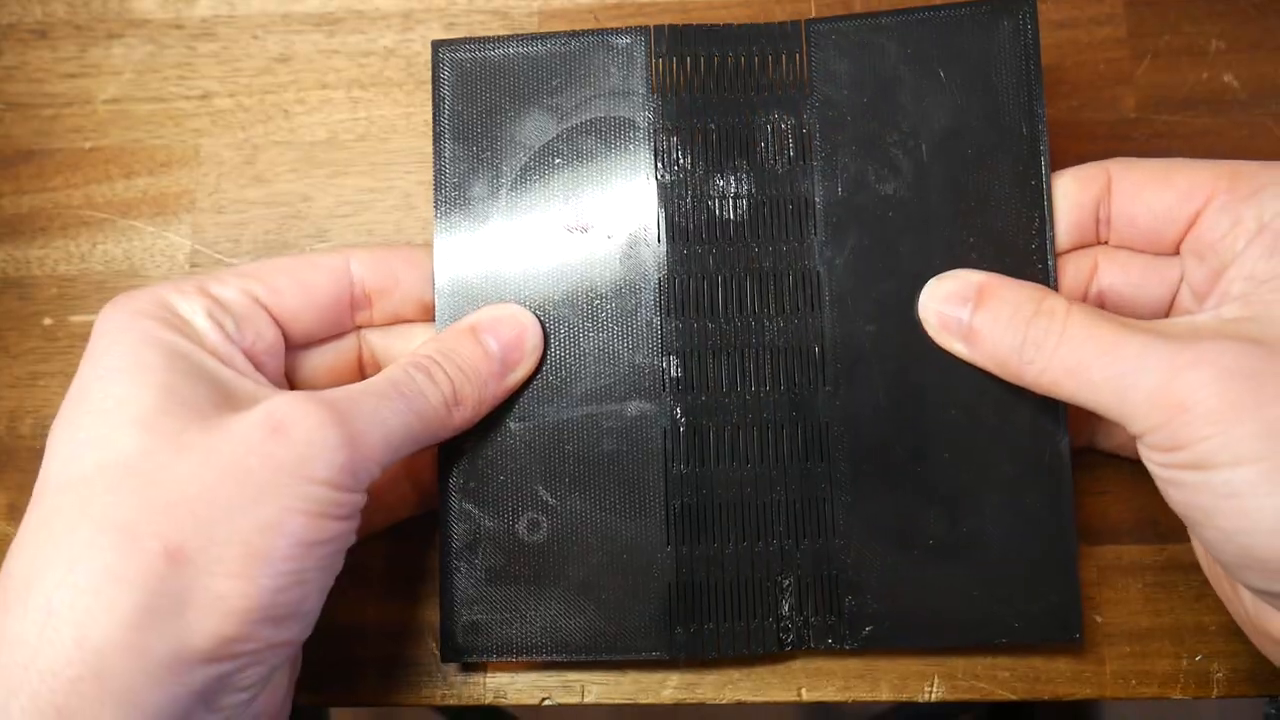
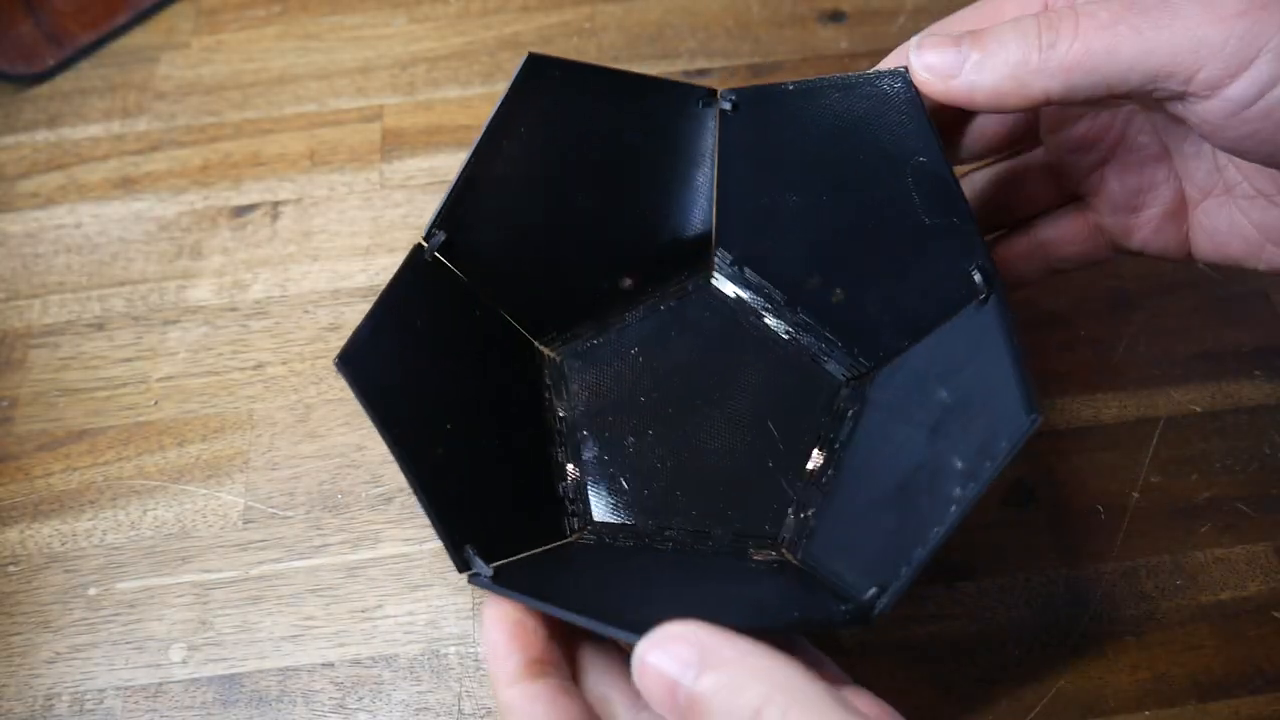
- The fold-up bowl: Flat pentagons with living hinges that fold into half a dodecahedron. Printed completely flat, assembled with small retaining clips.
- Compound curve strip: A long, skinny piece where the slotted section twists and folds into organic, multi-directional curves.
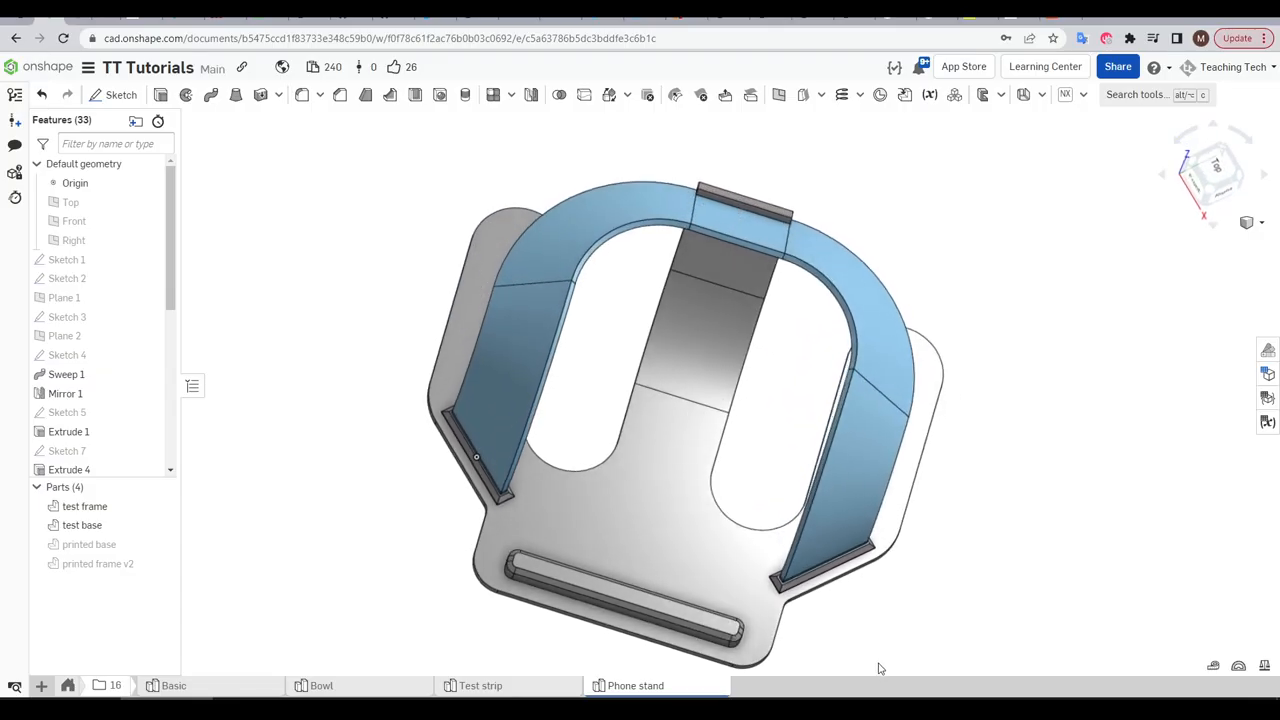
- Phone stand: A functional design combining a curved base with a twisted strip. Not perfect on the first try... the bend started in the wrong spot, the base flexed more than intended. But the potential was unmistakable.
That phone stand attempt is worth pausing on. It didn't nail the elegant curve he envisioned. The compound bend fought him. The parts kept popping apart until he reached for super glue.
But he shipped it anyway. Showed the failure. Pointed at what needed work.
That's the move. You don't wait for perfection... you learn in public and iterate.
No CAD? No Problem.
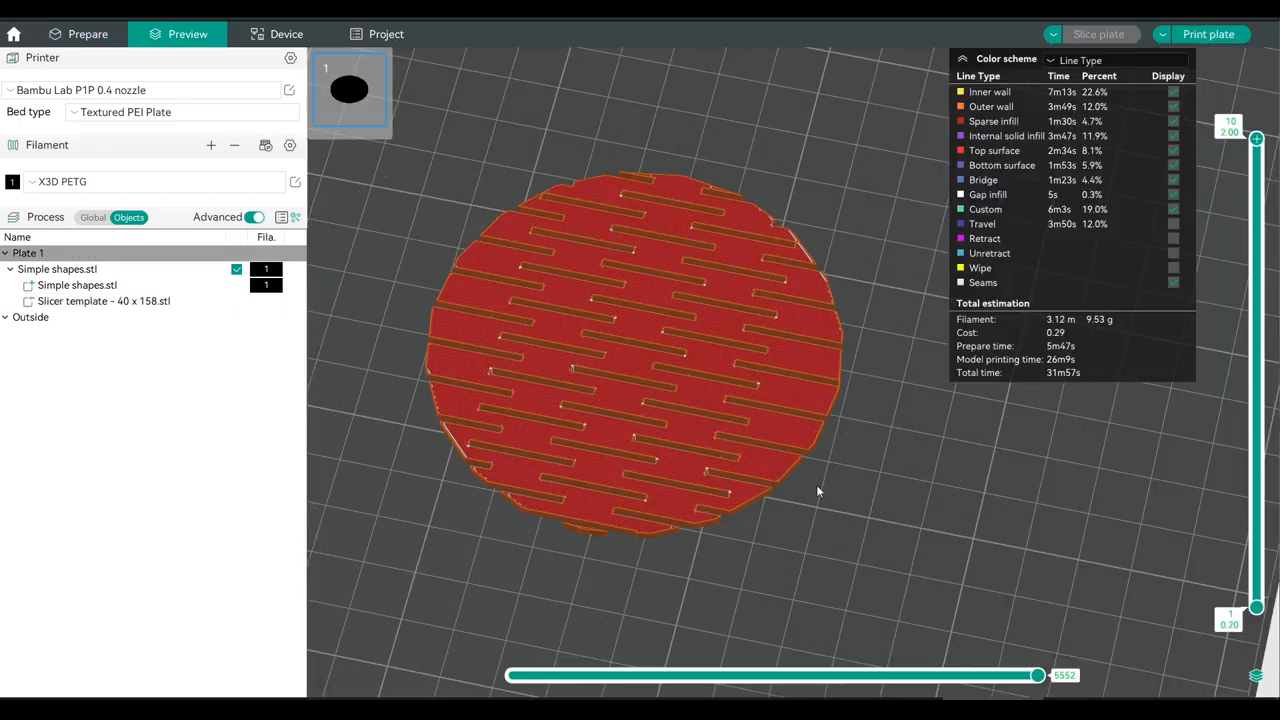
Michael built a slicer-only workaround for folks who aren't ready for Onshape or any CAD software. He exported the slot pattern as a standalone STL negative part. You import it into your slicer, overlap it with any thin object, and slice. The pattern cuts through automatically.
Different versions cover different applications. And if none of them fit, you can copy his source CAD, tweak the parameters, and export your own.
This is democratized design at its finest. The technique doesn't gatekeep behind CAD expertise. There's an on-ramp for every skill level.
The Deeper Principle
Rigidity isn't always strength. Sometimes the strongest thing you can do is build in room to flex.
A solid, unbroken sheet looks tougher. But it's brittle under unexpected loads. The slotted version absorbs stress, distributes force, and returns to shape. It bends without breaking.
There's a biomimicry echo here. Nature figured this out long ago... ribs, segmented exoskeletons, vertebrae. Strength through structured flexibility.
The linear pattern tool is the quiet hero of this whole workflow. It transforms a clever idea into a practical reality. Without it, you're drawing hundreds of individual slots by hand. With it, you define the rule once and let the tool do the repetitive work.
That's the real lesson for any maker: find the tools that turn your tedious into your automated... then spend your freed-up energy on the creative decisions that actually matter.
Print one of these. Seriously. The flat sheet version takes minimal filament and almost no time. Hold it in your hands. Bend it. Compress it. Feel the rectangles shift into triangles under your fingers. Some things you have to experience to understand... and this is one of them. Then ask yourself: what else could I make flexible that I always assumed had to be rigid? 💪
Original video by Teaching Tech — Watch on YouTube ↗
Echoes
Wisdom from across the constellation that resonates with this article.
“Try varying slot dimensions and spacing to tune flexibility vs. structural integrity for specific applications”
— Teaching Tech | Make your parts bendy with this design hack – 3D design for 3D printing Same Expert
“Test slot pattern on functional designs: cases, stands, bowls, or enclosures that benefit from fold-flat storage”
— Teaching Tech | Make your parts bendy with this design hack – 3D design for 3D printing Same Expert
“Experiment with the slicer-only STL negative part method for adding flex patterns without CAD”
— Teaching Tech | Make your parts bendy with this design hack – 3D design for 3D printing Same Expert